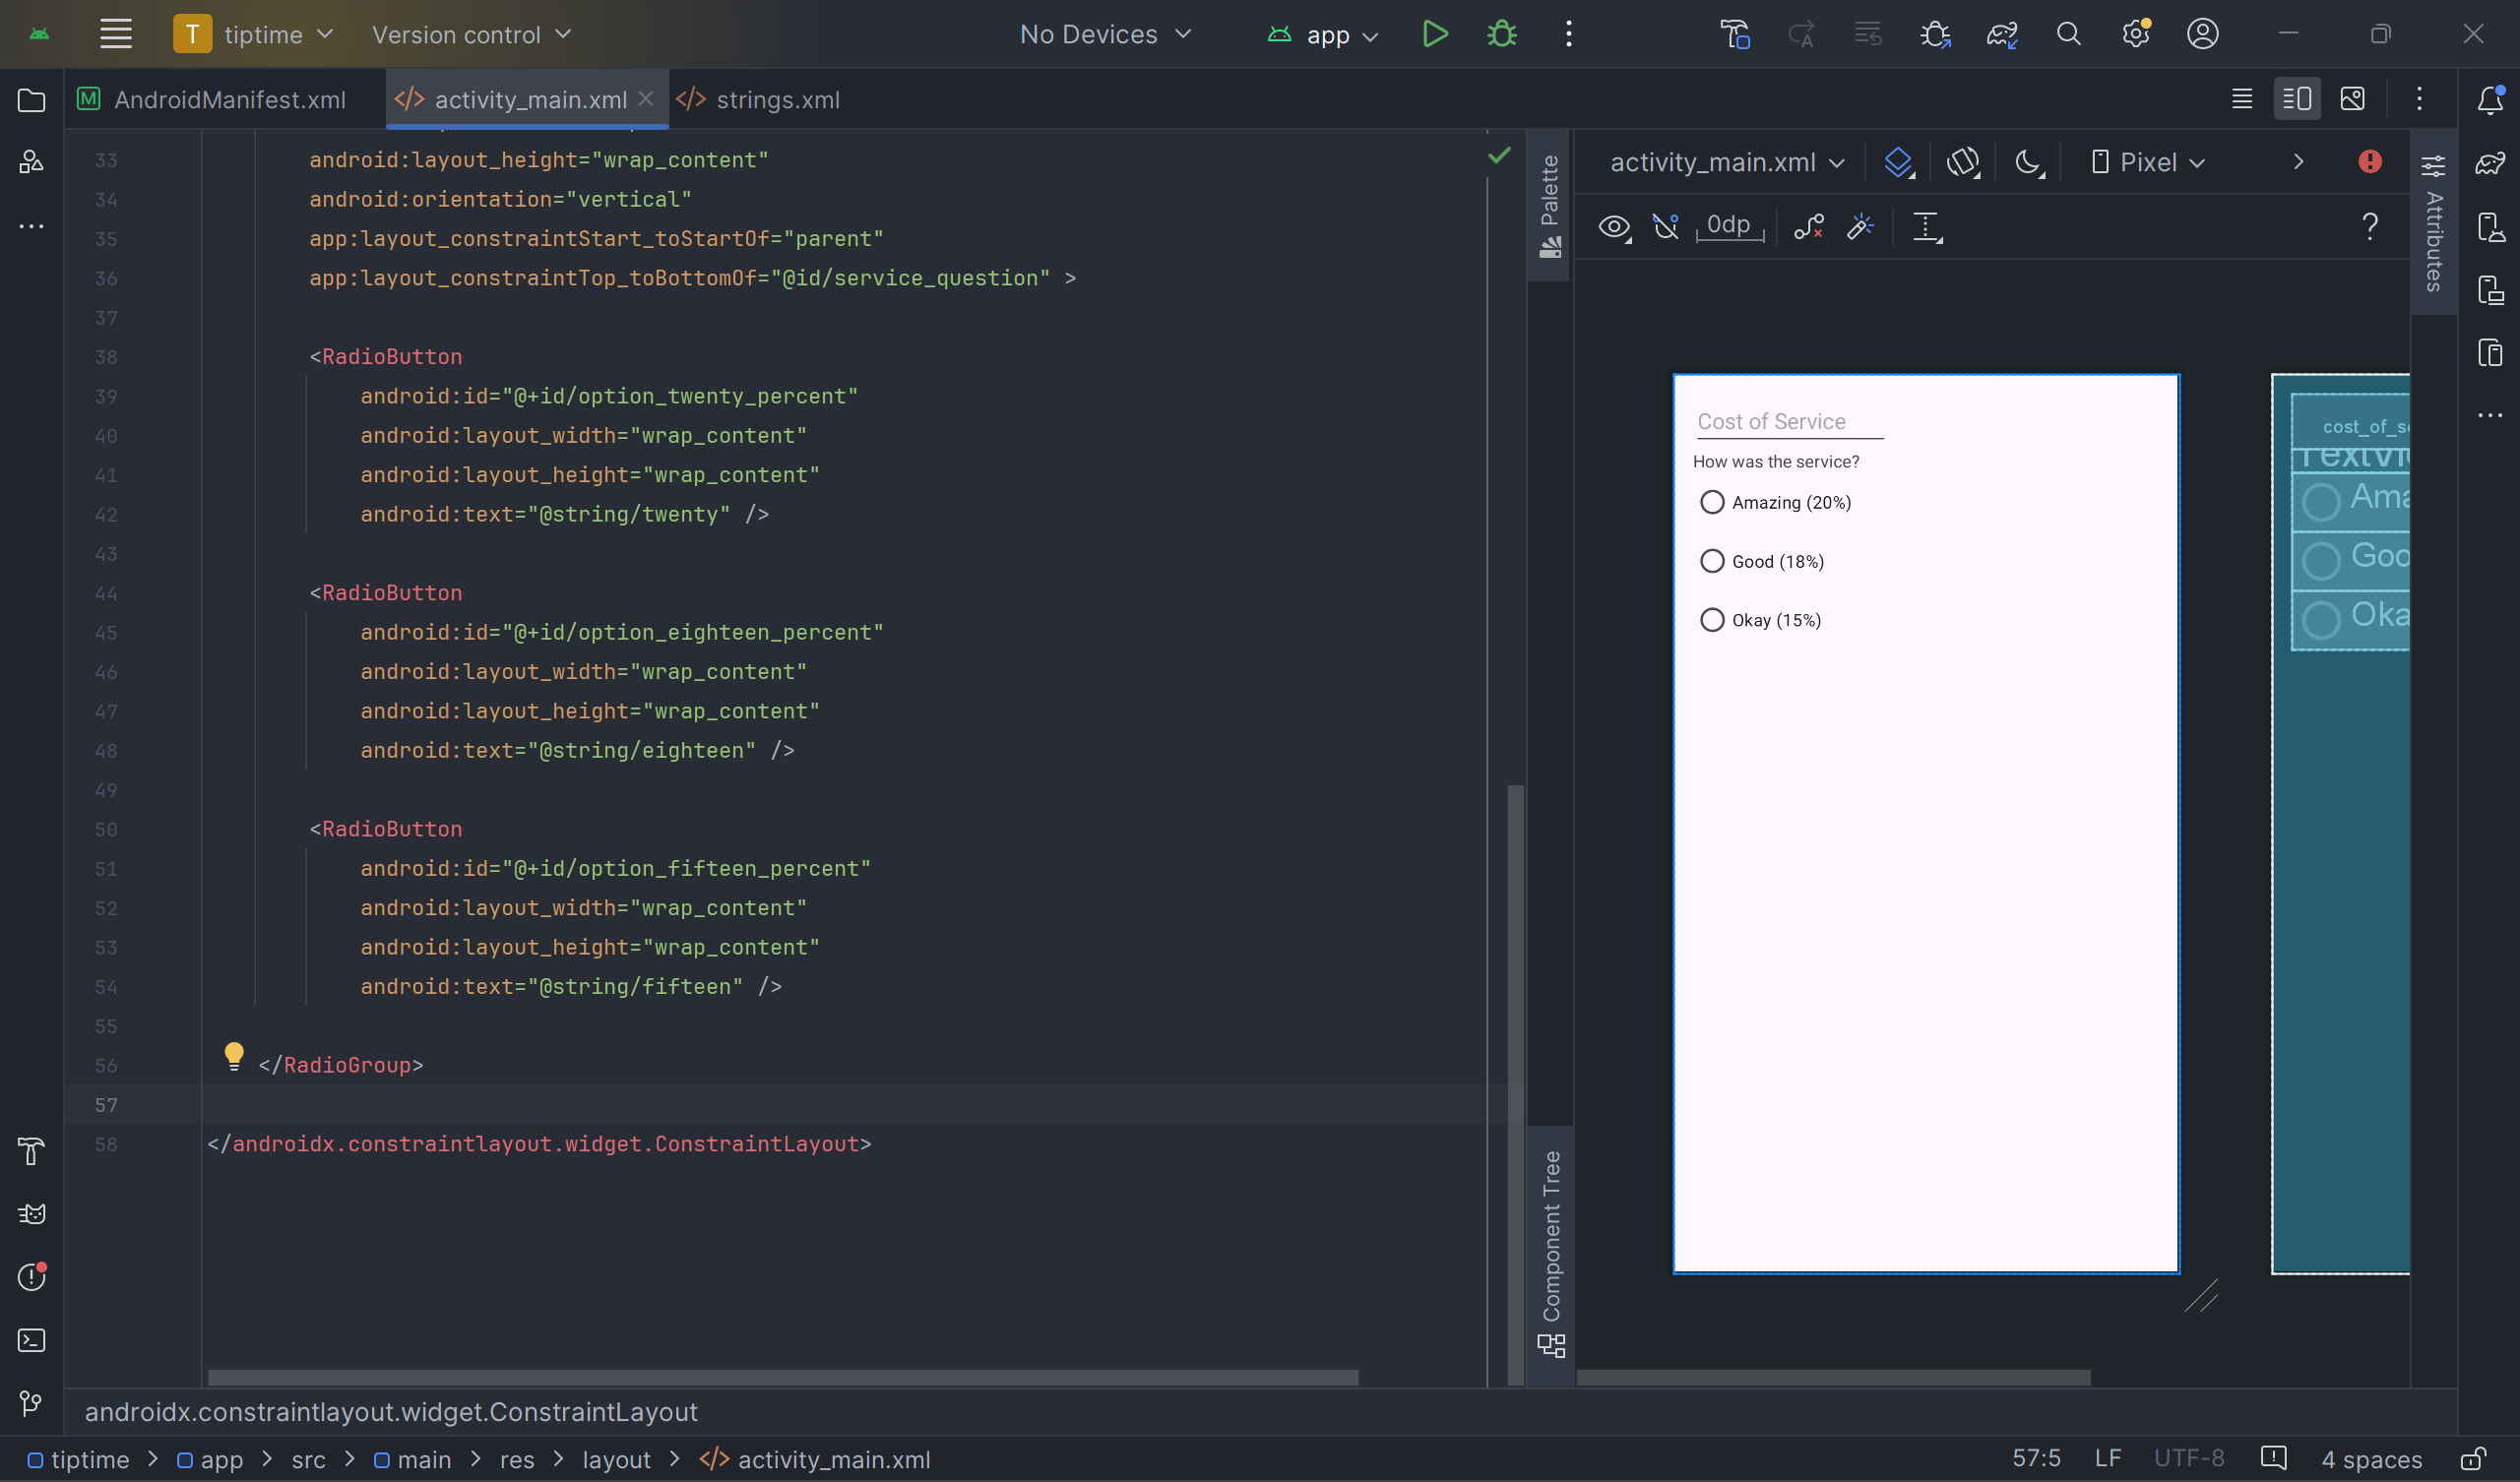
이제 사용자가 선택할 수 있는 다양한 팁 옵션에 사용할 라디오 버튼을 추가합니다. 옵션은 세 가지가 있어야 합니다.
- 훌륭함(20%)
- 좋음(18%)
- 괜찮음(15%)
저희가 이번에 사용할 레이아웃은 RadioGroup과 RadioButton이라는 위젯입니다. 사용하면서 방법을 익히면 되겠습니다.
추가되고 수정된 XML은 다음과 같습니다:
<RadioGroup
    android:id="@+id/tip_options"
    android:layout_width="wrap_content"
    android:layout_height="wrap_content"
    android:orientation="vertical"
    app:layout_constraintStart_toStartOf="parent"
    app:layout_constraintTop_toBottomOf="@id/service_question">

</RadioGroup>
우리는 생성될 버튼들의 배치되는 형태(vertical, 위에서 아래로 순차적 배치), 시작 위치를 지정해 주었습니다.
이제 RadioButton들을 이 안에 생성해 보도록 하겠습니다.
    <RadioGroup
        android:id="@+id/tip_options"
        android:layout_width="wrap_content"
        android:layout_height="wrap_content"
        android:orientation="vertical"
        app:layout_constraintStart_toStartOf="parent"
        app:layout_constraintTop_toBottomOf="@id/service_question" >

        <RadioButton
            android:id="@+id/option_twenty_percent"
            android:layout_width="wrap_content"
            android:layout_height="wrap_content"
            android:text="@string/twenty" />

        <RadioButton
            android:id="@+id/option_eighteen_percent"
            android:layout_width="wrap_content"
            android:layout_height="wrap_content"
            android:text="@string/eighteen" />

        <RadioButton
            android:id="@+id/option_fifteen_percent"
            android:layout_width="wrap_content"
            android:layout_height="wrap_content"
            android:text="@string/fifteen" />

    </RadioGroup>
이제 화면에 뭐가 좀 생겼네요!
기본 선택 추가
사용자가 선택하기 이전에 기본으로 선택될 팁을 지정하고, 반응하도록 해 봅시다. 이 기능은 RadioGroup의 속성인 checkedButton을 이용하여 구현할 수 있습니다.
<RadioGroup
   android:id="@+id/tip_options"
   android:checkedButton="@id/option_twenty_percent"
   ...
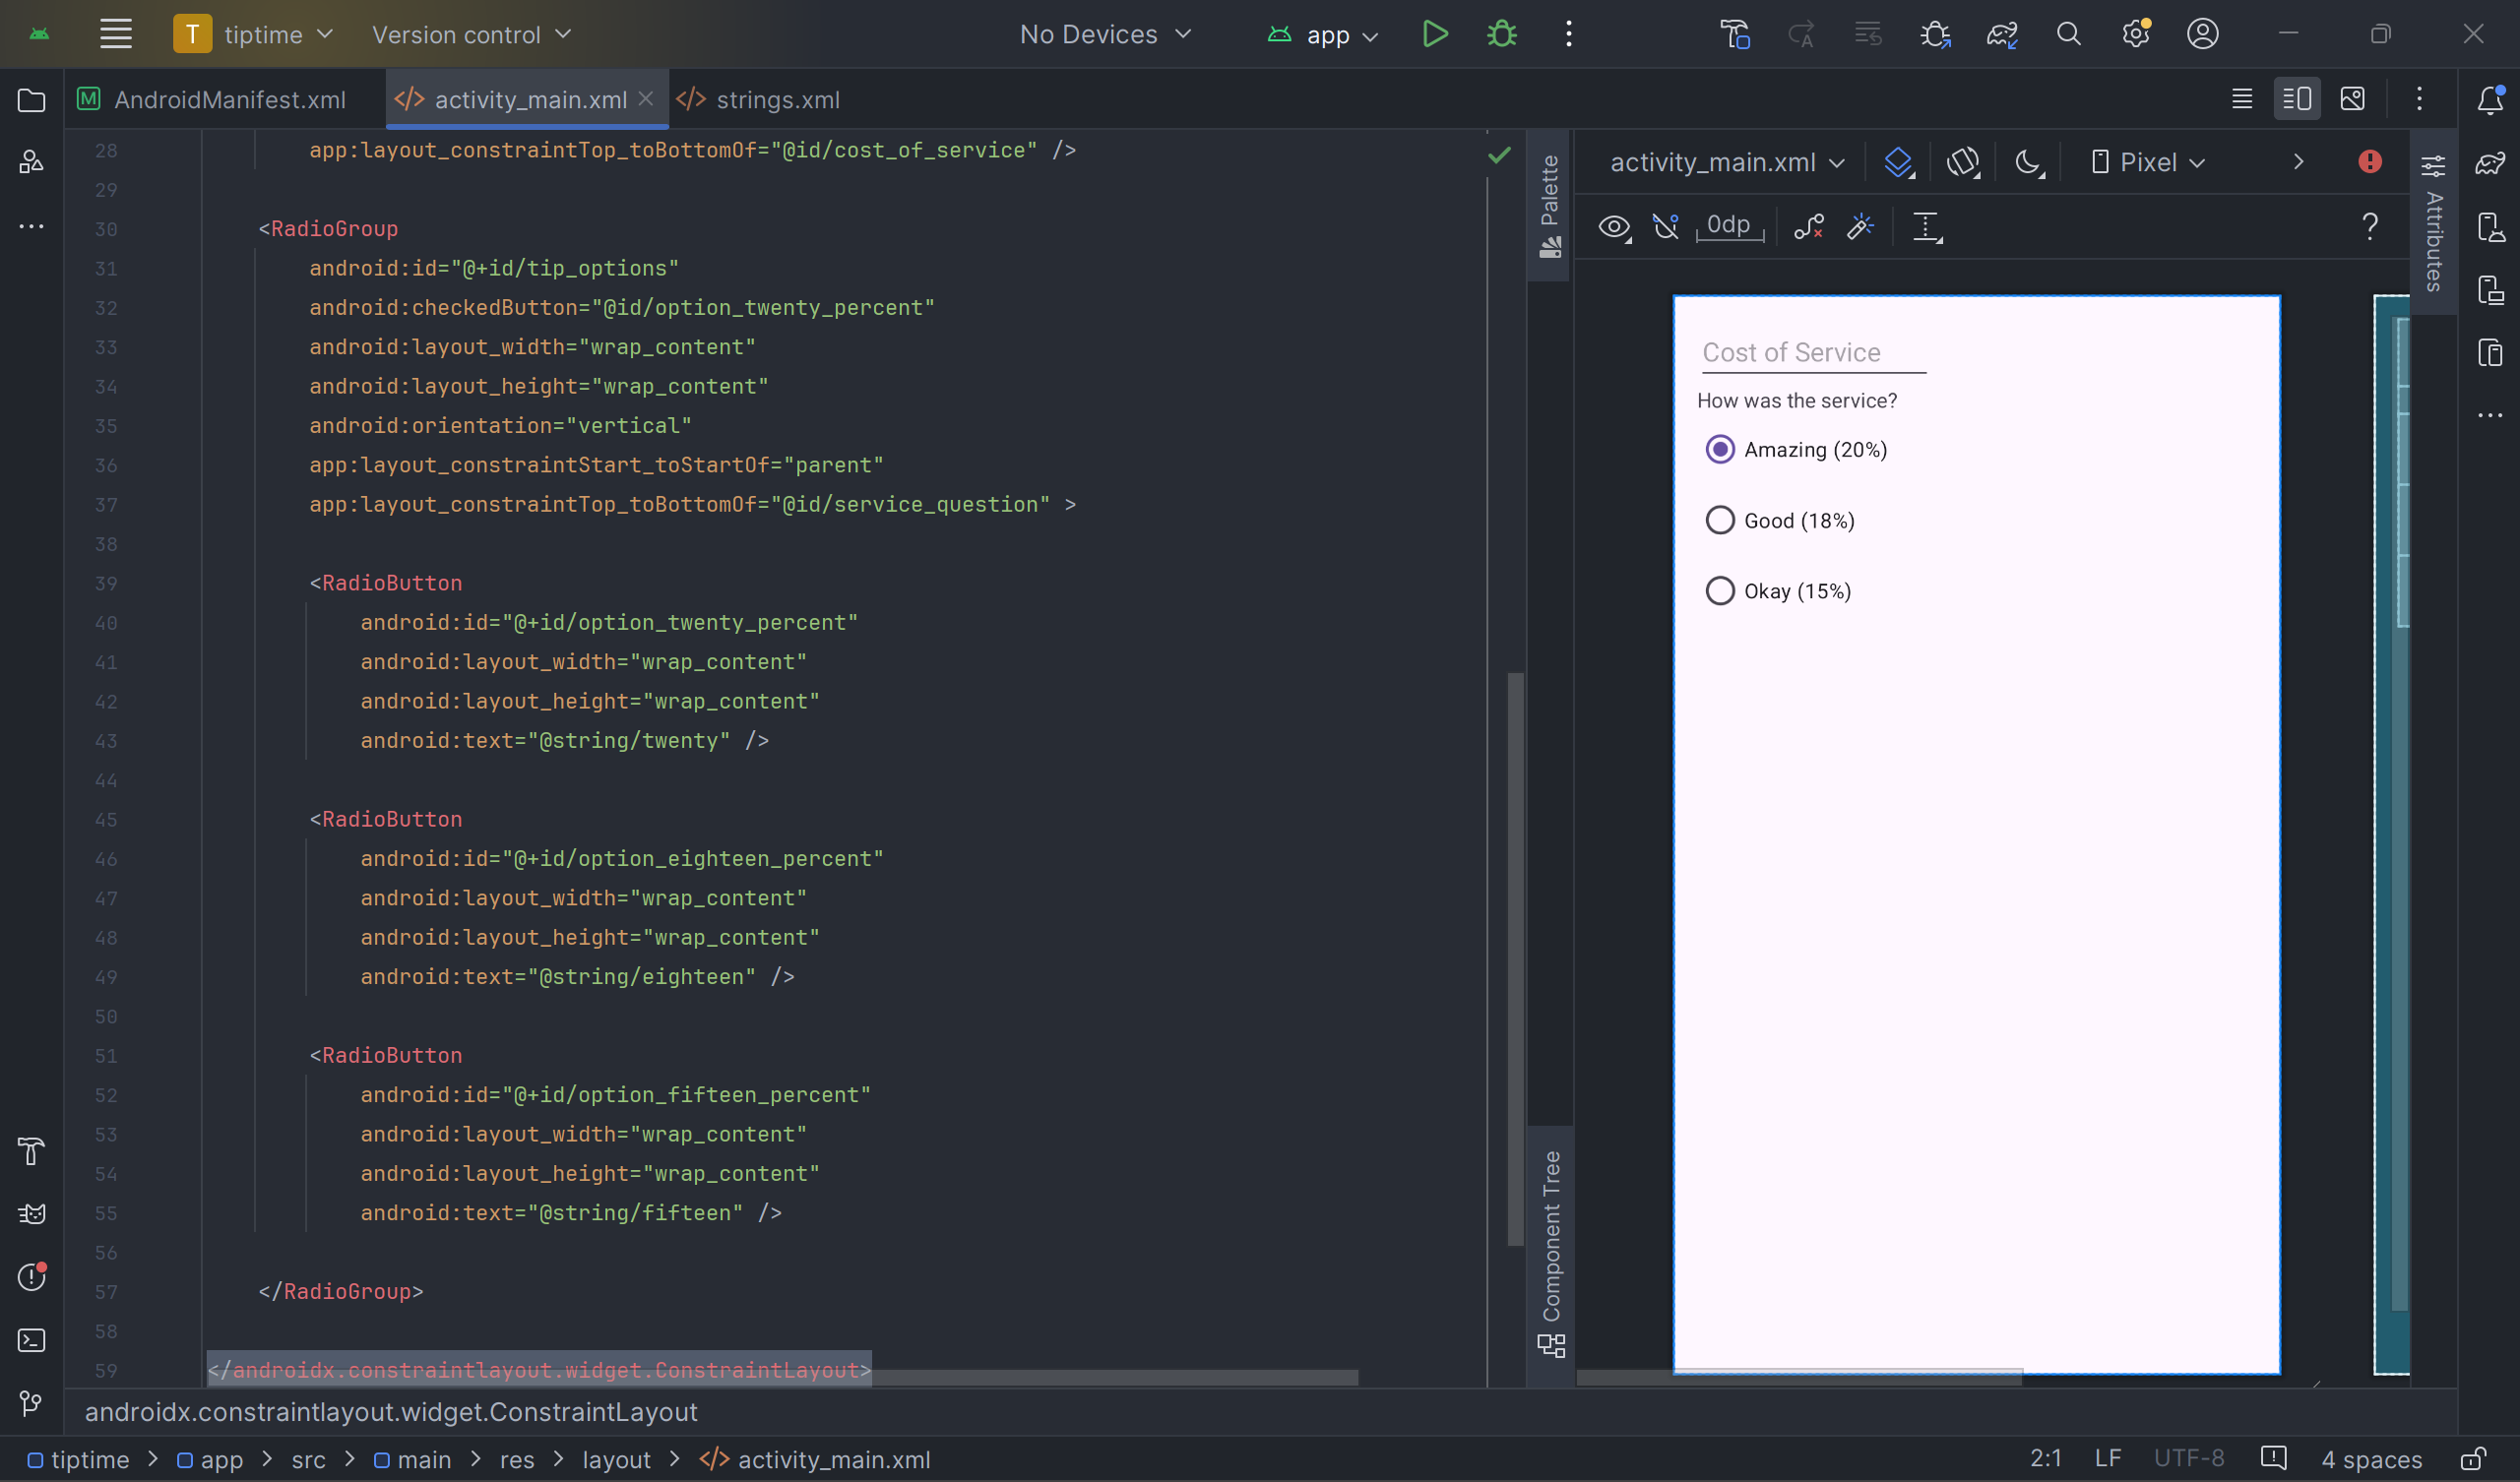
한 페이지이긴 하지만 그래도 이제 좀 앱처럼 보이기 시작하네요. 다음 포스팅에서는 나머지 레이아웃들을 추가해 보도록 하겠습니다.
'Project > Android' 카테고리의 다른 글
| [Android] Activity와 ViewBinding으로 화면 전환하기 (0) | 2024.04.01 |
|---|---|
| [Android] [팁 계산기] 5. 나머지 레이아웃 추가 (2) | 2024.03.27 |
| [Android] [팁 계산기] 3. XML로 레이아웃 만들기 (0) | 2024.03.26 |
| [Android] [팁 계산기] 2. XML의 이해 (0) | 2024.03.26 |
| [Android] [팁 계산기] 1. 템플릿 (0) | 2024.03.25 |


댓글